How to Measure a Room Part 1 How to Measure a Room Part 3
An elevation is a flat drawing of one wall that shows height and width. You will need one drawing for each wall. You already have the widths of the room and features on your floor plan, so now we’ll focus on heights.

1. Starting with Wall A, draw a rectangle to represent the wall on a new sheet of paper, and add in any features, such as a fireplace, window, door, baseboard and moldings.
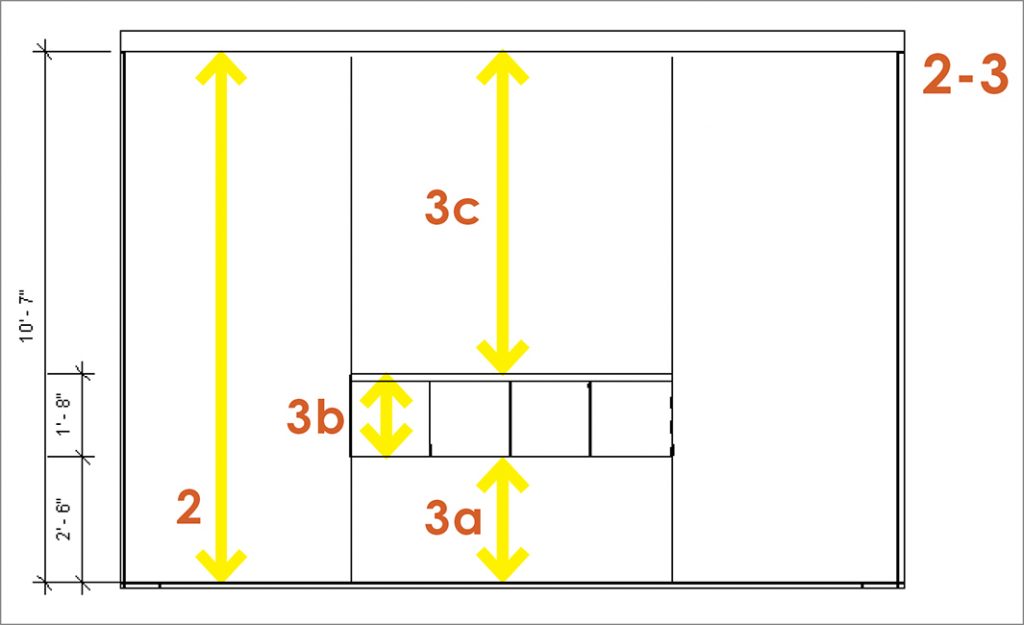
2. Measure the overall height of the room – add that measurement to the paper.
3 – a. For each fixed feature, window, or door, measure the distance from the floor to the bottom of any feature (such as a window). Mark on your paper.
– b. Measure the height of any features. Add measurements to your paper.
– c. Measure the distance from the top of the feature to the top of the wall or next feature, such as crown molding. Also measure the height of any trim or moulding.
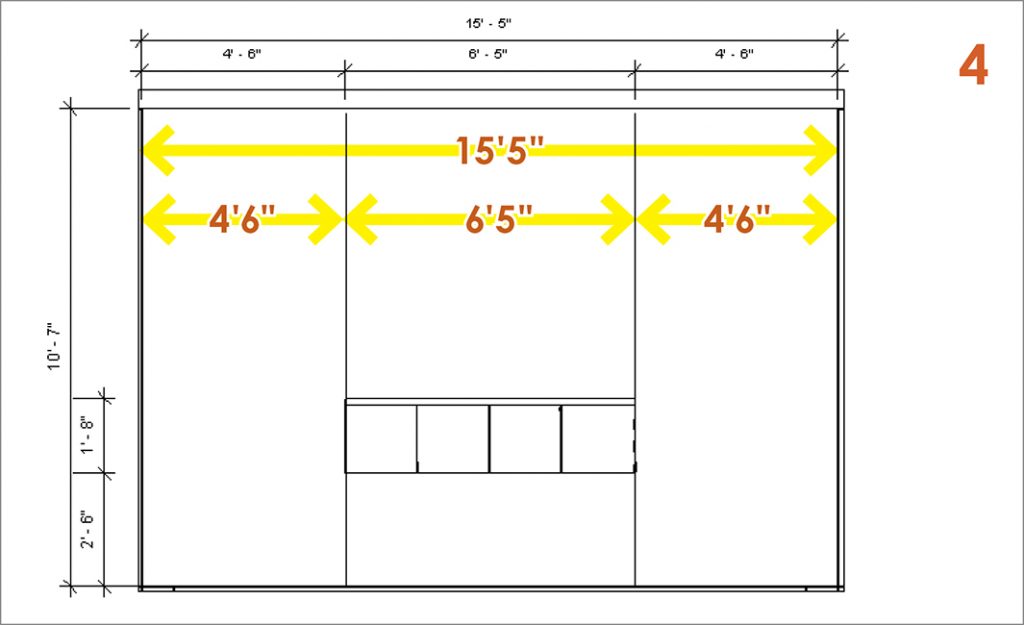
4. Add the widths of the room and features from your floor plan onto your elevation.
5. Draw the remaining walls of your room, each on a new sheet of paper, labeling each wall with the corresponding letter from your floor plan. (B, etc.)
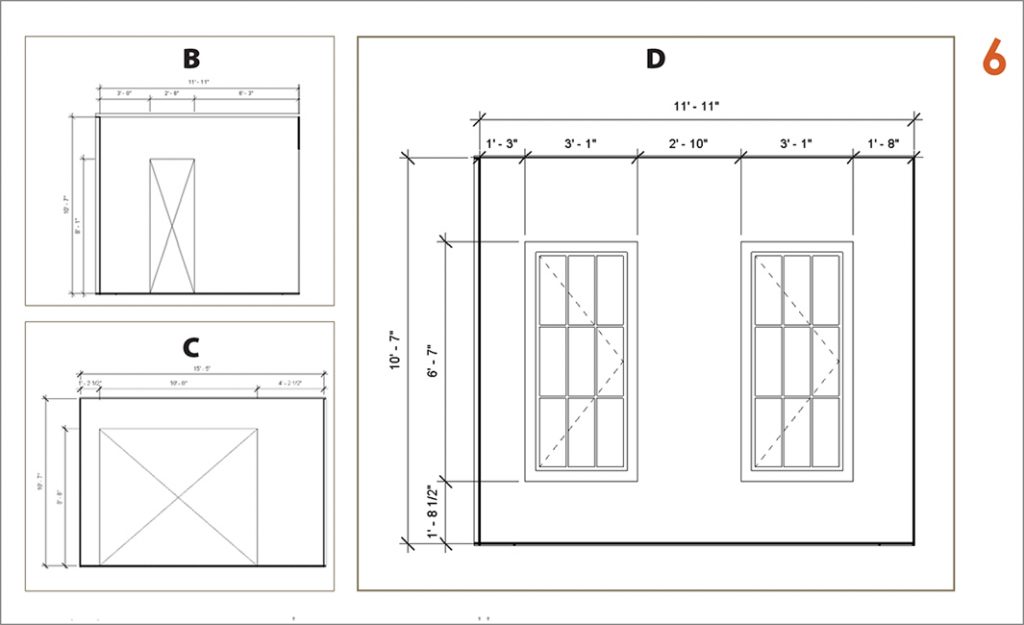
6. Move on to the next wall, repeating steps 2, 3 and 4: Measure all walls and feature heights, drawing in features and recording measurements on your paper as you go.
7. Measure and mark the height and width of any trim and moldings.
See next post for other helpful measurements and Part 3 of
“How to Measure a Room”.
Please call us at 717.295.0324 or contact us with any questions.